
So, you're wondering how to slow cook a pork roast in the oven and end up with tender, flavorful meat? You're in the right place. It’s a classic cooking method that transforms tougher cuts into melt-in-your-mouth goodness with surprisingly little effort. Achieving that perfect balance of juicy interior and a pleasing exterior requires understanding a few key variables.
Our research indicates that most home cooks can master this technique by making informed choices about the pork cut and desired outcome. For instance, manufacturer specifications for modern ovens generally confirm consistent temperature distributions within a +/- 25°F range, crucial for predictable slow cooking results. Let's break down how to get it right, every time.
Understanding Your Pork Roast Cut
This is where we start, because not all pork roasts are created equal, and your choice dictates the entire cooking approach. What you buy at the butcher counter or grocery store will significantly influence how long it needs in the oven and what kind of texture you’ll achieve.
Is It Shoulder, Butt, or Loin?
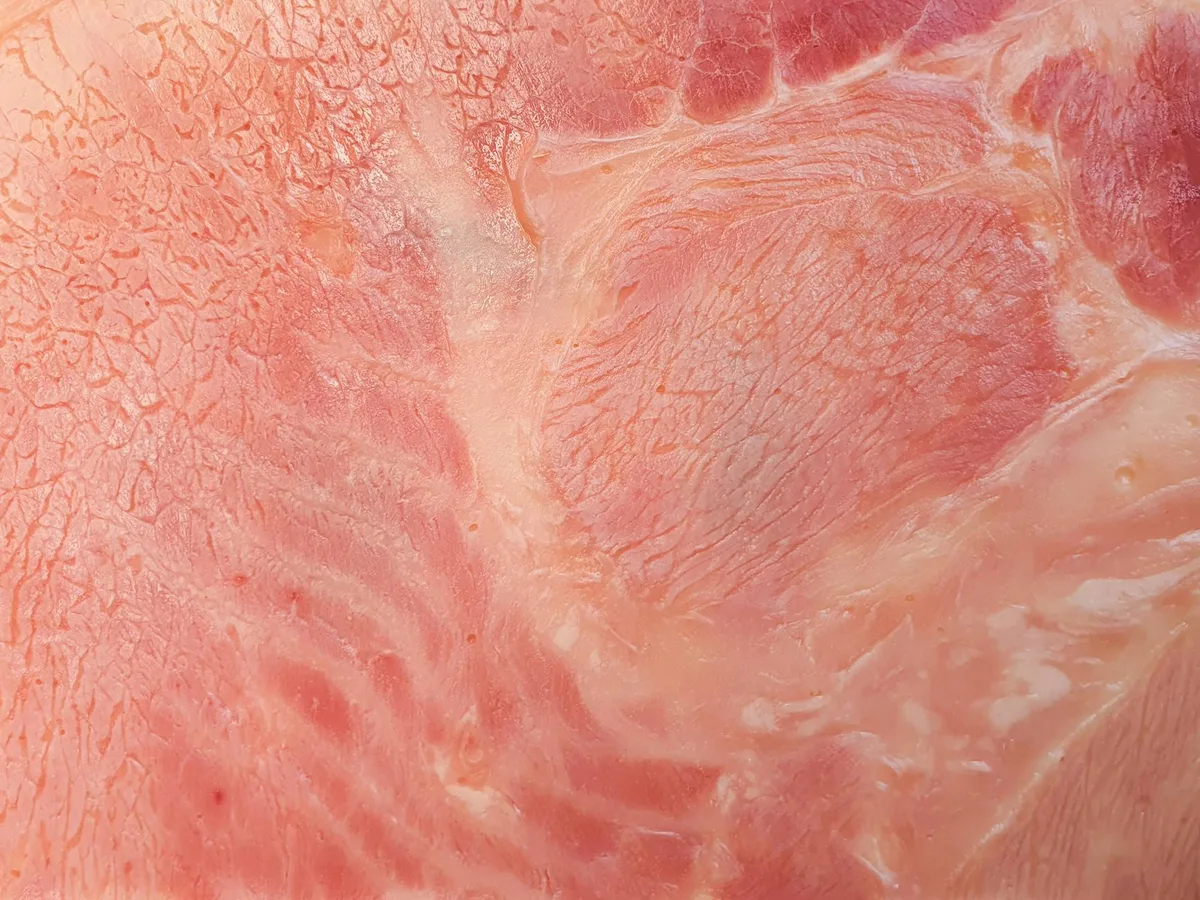
The terms pork shoulder, Boston butt, and picnic roast often refer to the same area, which is ideal for slow cooking. This cut is rich in marbling, those little flecks of fat woven through the muscle. It also has plenty of connective tissue, which breaks down over long, low-temperature cooking to create incredible tenderness and moisture.
On the other hand, a pork loin, like a center-cut loin or tenderloin, is a much leaner cut. It lacks the intramuscular fat and connective tissue of the shoulder. Trying to slow cook a pork loin for the same extended periods as a shoulder will almost certainly result in dry, tough meat. Loin roasts are often better suited for shorter cooking times at slightly higher temperatures to keep them from drying out.
What's Your Pork Roast Master Plan?
Before we even preheat the oven, we need to decide what we want the end result to be. This decision will guide how we cook it, particularly the target temperature and cooking time. Think about how you plan to serve this pork.
Shredded Perfection for Sandwiches and Tacos
If your goal is that glorious, fall-apart tender, easily shredded pork, you absolutely want to start with a pork shoulder or Boston butt. This cut is designed for low-and-slow cooking. It requires a significant amount of time, typically 6 to 8 hours, sometimes longer for larger roasts, for those fats and connective tissues to break down completely. This process creates incredibly moist and flavorful meat that shreds beautifully, perfect for pulled pork sandwiches, tacos, or even barbecue platters.
A Sliceable, Tender Roast for Dinner
For a roast you want to slice into neat portions, you have a couple of options, but you need to be more precise. A pork shoulder, if pulled from the oven slightly earlier in its cooking cycle, can still yield a wonderfully tender, sliceable roast, though it might have a slightly richer, more robust flavor profile than a loin.
A pork loin, being leaner, is also a candidate for a sliceable roast. However, its success hinges on careful temperature control. The target internal temperature for a sliceable pork loin is much lower than for shredded shoulder. Overcooking even by a few degrees means dry, disappointing results.
Manufacturer specifications often recommend different internal temperatures for pork loin to maintain juiciness, typically in the range of 145°F to 155°F (63°C to 68°C).
The Oven Slow Cook: Your Step-by-Step Guide
This is where we get hands-on. Slow cooking in the oven is a process that rewards patience and preparation. Think of it less as active cooking and more as guiding your roast through a transformational phase. Follow these steps for a successful outcome.
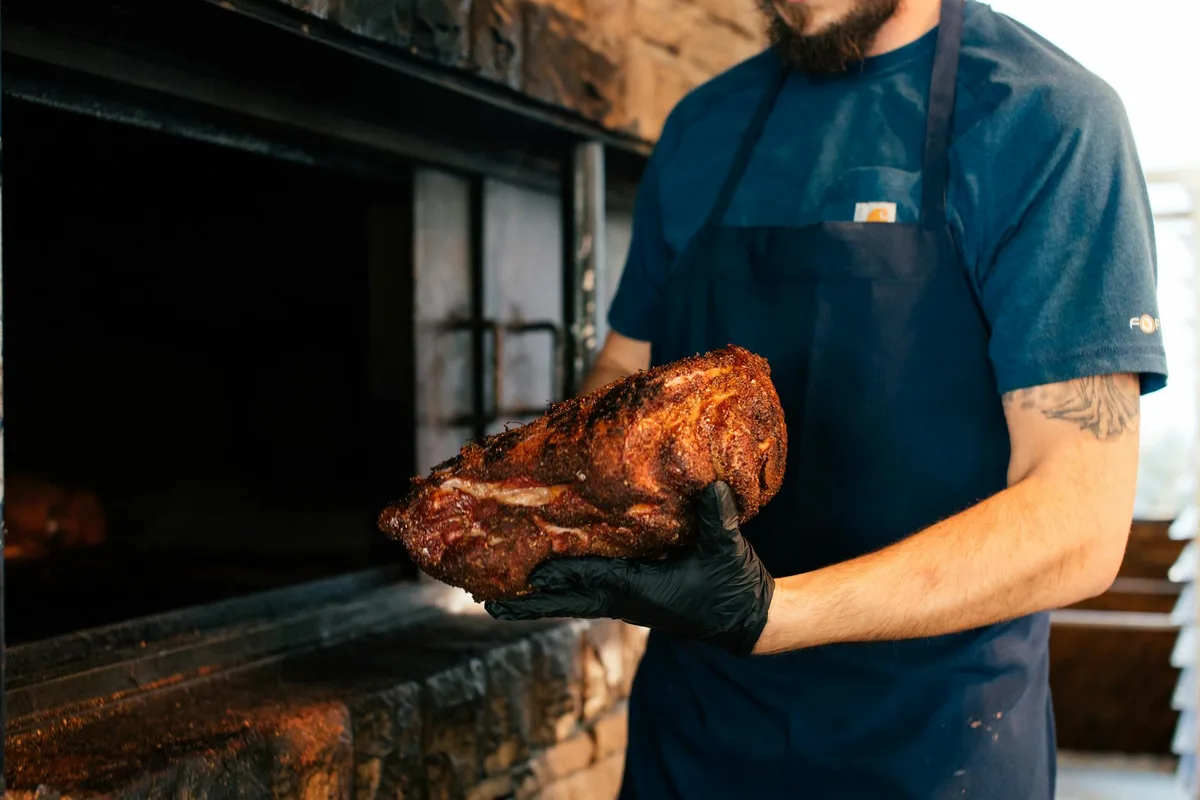
Step 1: Prep Your Pork (Dry, Season, and Sear)
First, take your pork roast out of the refrigerator about an hour before you plan to start cooking. Letting it come closer to room temperature helps it cook more evenly. Pat the roast completely dry with paper towels. Seriously, get it dry.
This step is crucial for developing a good sear.
Then, season it generously. A good base is salt, black pepper, and garlic powder. You can get creative with other spices like paprika, onion powder, or even a bit of chili powder for a mild kick. Some people like to apply a thin layer of Dijon mustard or a little olive oil first to help the seasonings adhere.
For a pork shoulder aimed at shredding, a more robust rub is welcome. For a leaner loin, a simpler salt-and-pepper treatment might be best to let the natural pork flavor shine.
Step 2: Sear for Flavor (Stovetop or Pan)
Searing your pork roast before it goes into the oven adds a significant layer of flavor and helps create a beautiful crust. If you’re using an oven-safe pot, like a Dutch oven, heat a couple of tablespoons of neutral cooking oil (such as canola or vegetable oil) over medium-high heat on your stovetop. Once the oil is hot and shimmering, carefully place the seasoned roast into the pot. Sear it on all sides until it’s deeply browned.
This typically takes about 2-3 minutes per side.
If you don't have an oven-safe pot, you can sear the roast in a regular skillet and then transfer it to your baking dish for the oven portion. Don’t overcrowd the pan; sear in batches if necessary to ensure a good crust rather than steaming the meat.
Step 3: Add the Liquid Base
After searing, if you’re using a Dutch oven, you can add your liquid directly to the pot. If you transferred your roast to a baking dish, add the liquid to the bottom of that dish. You don't need to submerge the roast; about ½ to 1 cup of liquid is usually sufficient for a standard roast. This liquid creates steam in the oven, which helps keep the meat moist during its long cook.
Good choices for liquid include:
- Chicken broth
- Beef broth
- Vegetable broth
- Apple cider or juice
- Beer (a lager or amber ale works well)
- Water (less flavor, but still effective for moisture)
Cooking Scenarios & Timelines
Now we match our preparation to our desired outcome. The cut of pork and your aiming point, shredded or sliced, dictate the specific temperature and time needed.
Scenario A: Pork Shoulder for Shredded Pulled Pork (6-8+ Hours)
When you've got a pork shoulder and the goal is succulent pulled pork, patience is your best friend. This cut needs time to perform its magic. Preheat your oven to a low temperature, typically 300°F (150°C). Place the seared and seasoned roast in your covered Dutch oven or a well-covered roasting pan.
The cooking time will vary based on the size of your roast, but a 4-6 pound pork shoulder can take anywhere from 6 to 8 hours, and sometimes even longer. The key is not to rush it. You're waiting for the meat to reach a point where it's exceptionally tender and easily pulls apart with minimal effort. If you’re aiming for shreddable perfection, it’s often best to cook until the internal temperature is in the 195°F to 205°F (90°C to 96°C) range.
This is a lot higher than for slicing, but it's essential for that tender, shredded texture.
Scenario B: Pork Loin for Sliceable Roast (Quicker, Careful Timing)
If you're working with a pork loin and want a roast that’s easy to slice, you’ll be cooking at a slightly higher temperature and for a shorter duration. Preheat your oven to 375°F (190°C). Place the seared loin in a roasting pan.
The general guideline is about 20-25 minutes per pound. However, the most critical factor here is achieving the correct internal temperature without overcooking. For a safe and tender sliceable roast, you're aiming for an internal temperature of 145°F (63°C) for medium-rare to medium. If you prefer it more well-done, aim for 150°F to 155°F (65°C to 68°C).
It's vital to pull the roast from the oven as soon as it hits your target temperature.
Temperature Targets: The Secret to Perfect Doneness
Using a reliable meat thermometer is non-negotiable for successful pork roasts, especially with leaner cuts like pork loin. For pulled pork from a shoulder, you're looking for a high internal temperature in the 195-205°F (90-96°C) range. This high heat degrades collagen and fat, leading to that wonderfully tender, shreddable texture.
For a sliceable pork loin, the target is significantly lower. Aim for 145°F (63°C) for medium, which is considered safe by the United States Department of Agriculture (USDA) for whole cuts of pork, and is recommended for optimal tenderness and juiciness. Waiting five minutes after removing it from the heat allows the temperature to rise slightly (carryover cooking) and the juices to redistribute.
Oven Temperatures: Choosing the Right Heat
The temperature you set for your oven is a direct dial for the cooking method you employ. It's not just about heat, but about the type of heat applied over time.
Low & Slow (300°F/150°C) for Shoulder
When you're aiming for that deeply tender, shreddable pulled pork from a pork shoulder, the low-and-slow approach is paramount. Setting your oven to 300°F (150°C) allows the tough connective tissues and abundant fat within the pork shoulder to slowly render down. This process is what transforms a potentially tough cut into incredibly moist and flavorful meat. Cooking at this lower temperature for an extended period, typically 6-8 hours for a 4-6 pound roast, ensures that the muscle fibers break down gradually, releasing their juices and creating a texture that falls apart with just the touch of a fork.
This method is forgiving and consistently yields excellent results for shredded pork.
Moderate Heat (375°F/190°C) for Loin
For a pork loin, the strategy is quite different. A leaner cut like pork loin can easily dry out if subjected to prolonged low-temperature cooking. Therefore, a moderate oven temperature of 375°F (190°C) is more appropriate. This higher heat allows the roast to cook through more quickly, minimizing the time the muscle fibers are exposed to heat.
The goal here is to reach the target internal temperature for doneness, around 145°F (63°C) for medium, before the moisture has a chance to escape. This method requires closer attention and a good meat thermometer to prevent the roast from becoming overcooked and dry.
The Crucial "Rest" and Shredding Phase
Once your pork roast has reached its target internal temperature and you've removed it from the oven, the work isn't quite done. Letting the roast rest is a critical step for both shredded and sliceable cuts. For a shredded shoulder, allow it to rest in its cooking liquid or a separate bowl for at least 15-20 minutes. This allows the juices, which have been pushed to the center during cooking, to redistribute throughout the meat.
Without this rest, you'll lose a significant amount of that precious moisture and flavor when you start shredding.
After resting, for a pork shoulder, you’ll want to shred the meat. Using two forks, simply pull the meat apart until it’s separated into chunks or fine shreds, depending on your preference. For pulled pork, it's a good idea to mix the shredded meat back into some of the cooking liquid from the bottom of the pot or pan. This ensures the pulled pork stays incredibly moist and flavorful.
For a sliceable roast, resting allows the juices to settle, making it easier to carve clean slices without all the moisture running out.
Common Slow Cooking Mistakes to Avoid
Even with straightforward recipes, a few common missteps can turn a promising roast into a disappointing meal. Being aware of these pitfalls can help you troubleshoot and ensure success, especially when you're new to slow cooking pork.
Overcooking Lean Cuts
This is arguably the biggest mistake when it comes to pork loin or any lean cut. As we’ve covered, lean pork lacks the intramuscular fat that insulates it during long cooking. If you treat a pork loin the same way you would a pork shoulder, leaving it in the oven for hours at a low temperature, you're essentially drying out the available moisture. For loin, always use a meat thermometer and aim for that 145°F (63°C) mark, then remove it from the heat.
Not Resting the Meat
This mistake applies to both shoulder and loin, though it’s more immediately noticeable with loin. If you cut into a fresh-from-the-oven roast, you’ll see juices run out onto the cutting board. That’s lost flavor and moisture. Resting allows the meat’s fibers to relax and reabsorb those juices.
For a loin, this means tender, sliceable meat. For a shoulder, it means the meat stays moist and doesn't become dry as you shred it. Always allocate at least 15-20 minutes for resting.
Expert Tips for Unbeatable Pork Roast Flavor
Beyond the basic steps, a few tried-and-true techniques can elevate your slow-cooked pork roast from good to absolutely fantastic. These are small adjustments that make a big difference.
- Don't Skimp on Seasoning: Pork is a blank canvas that loves flavor. Use salt and pepper liberally, especially for a shoulder roast where a robust rub can add complexity. Consider adding smoked paprika for a depth of flavor or a touch of brown sugar for a hint of sweetness.
- Use Quality Broth: Your braising liquid contributes flavor. Opt for a good quality chicken or beef broth instead of just water. For a pork shoulder, apple cider can add a lovely sweet and tangy note.
- Consider Aromatics: Adding aromatics like chopped onions, garlic cloves, carrots, or celery to the bottom of the pot before adding the roast can infuse additional flavor into the cooking juices, which you can then use to baste or serve with the pork.
- Resting Time is Sacrosanct: We’ve mentioned it multiple times because it’s that important. A rested roast is a juicy roast.
Food Safety When Slow Cooking Pork
Ensuring your pork is cooked to a safe internal temperature is paramount. While slow cooking is generally forgiving, understanding the food safety guidelines prevents illness. The USDA recommends an internal temperature of 145°F (63°C) for whole cuts of pork, followed by a three-minute rest time. This temperature is sufficient to kill any harmful bacteria.
For pork shoulder intended for shredding, reaching higher temperatures like 195-205°F (90-96°C) is for texture, not just safety, as these temperatures have long passed the safety threshold. Always use a reliable meat thermometer to check the thickest part of the roast, avoiding bone. If you’re unsure, consulting official guidelines from sources like the USDA's Food Safety and Inspection Service is always a good practice.
When to Use a Thermometer (Pro Tip!)
You might be tempted to forgo a thermometer, especially if you're cooking a pork shoulder for many hours. However, even with a robust cut like shoulder, a thermometer provides certainty. It tells you exactly when the roast has reached that tender point, preventing you from overcooking it (which can still happen if you guess wrong on time) or undercooking it.
For pork loin, using a thermometer isn't just a pro tip; it's essential. The margin for error is much smaller. A few degrees too far and you have a dry roast. A thermometer ensures you hit that perfect sweet spot of 145°F (63°C) for a tender, juicy, and safe sliceable pork loin.
As of 2026, reliable instant-read digital thermometers are widely available and are an angler’s best friend and a cook’s secret weapon for accurate temperature readings.
Alternatives to Oven Slow Cooking for Pork
While oven slow cooking is fantastic, there are other methods if your oven is occupied or you’re looking for a different cooking profile. Each offers unique advantages. The choice often comes down to speed, desired texture, and available equipment.
- Slow Cooker (Crock-Pot): This is perhaps the most common alternative. Slow cookers are designed specifically for low-and-slow cooking, typically using around 200°F (93°C). They are incredibly hands-off and excellent for unattended cooking. They excel at producing tender, shreddable meat from pork shoulders, similar to oven-cooked roasts but often with less crust development unless you sear beforehand.
- Pressure Cooker (Instant Pot): For speed, a pressure cooker is unmatched. It can reduce cooking times dramatically, turning a shoulder roast tender in about 60-90 minutes under pressure. However, the texture is different; it’s tender but less "shreddy" and often lacks the rich, deep flavor developed over hours of slow roasting.
- Smoker: If you want that unmistakable smoky flavor, a smoker is the way to go. This method involves cooking pork shoulder at low temperatures (225-275°F or 107-135°C) for many hours over wood smoke. It’s a dedicated process but yields unparalleled flavor for barbecue.
Who is Oven Slow Cooking Pork Best For?
This method shines for a particular type of home cook and occasion. It's ideal when you have a few hours to spare but don't want to be constantly tending to the food. The oven provides a stable, consistent heat source that is easy to manage.
This technique is perfect for busy weeknights or weekends when you want a delicious meal simmering away with minimal intervention. If you're entertaining, popping a large pork shoulder in the oven in the morning means a spectacular main course is ready by dinner without constant fuss. It’s also a great option if you don't have a dedicated slow cooker or pressure cooker, as most kitchens are equipped with an oven.
Costs and Equipment Considerations
The primary cost involved is, of course, the pork roast itself, which can range from $2-$5 per pound depending on the cut and location. Beyond that, the main investment is your cooking vessel. A good quality Dutch oven or a heavy-duty roasting pan with a tight-fitting lid is essential. As of 2026, a 5-6 quart Dutch oven suitable for this purpose can range from $50 to $300 or more, depending on the brand and material.
A reliable instant-read meat thermometer is also a must-have, typically costing between $15 and $50. Other costs are minimal: seasonings, a bit of cooking oil, and your chosen braising liquid, all of which are pantry staples for most home cooks. The true "cost" is the time invested in the cooking process, which is largely hands-off.
What to Do with Leftover Slow Cooked Pork
Leftovers from a slow-cooked pork roast are incredibly versatile, much more so than a less tender cut. If you've made a pork shoulder for shredding, you've got a goldmine for subsequent meals. The moist, flavorful meat can be incorporated into a surprising number of dishes.
- Soups and Stews: Shredded pork adds incredible depth to brothy soups or hearty stews. Consider adding it to a black bean soup base or a ranchero-style stew. It freezes exceptionally well in these applications; best soups for freezing often benefit from pre-cooked, shredded meats.
- Tacos and Quesadillas: Reheat the shredded pork and use it as a filling for tacos or quesadillas. A quick pan-fry can reintroduce a slightly crisp texture.
- Shepherd's Pie or Casseroles: Mixed with vegetables and a sauce, shredded pork makes a fantastic base for a savory pie or casserole.
- Sandwich Sliders: Reheat and serve on small slider buns with your favorite barbecue sauce for an easy appetizer or quick lunch.
Store any leftovers promptly in airtight containers, best containers for freezing individual meals and best containers for freezing are well-suited for this purpose, in the refrigerator for up to 3-4 days, or freeze for longer storage.
Frequently Asked Questions About Slow Cooking Pork Roast
### Can I cook a frozen pork roast in the oven?
It's generally not recommended to slow cook a frozen pork roast. Scientific research and official guidelines from food safety organizations suggest that frozen meat cooked at low temperatures for extended periods may not reach a safe internal temperature quickly enough, increasing the risk of bacterial growth. It's always best to thaw your pork roast completely in the refrigerator before cooking to ensure even cooking and food safety.
### Do I need to cover the pork roast?
Yes, covering the pork roast is essential, especially when slow cooking pork shoulder. Covering creates a moist environment in the oven through steaming. This is crucial for breaking down the connective tissues and rendering the fats in tougher cuts like pork shoulder, ensuring tenderness and juiciness. For pork loin, a tight cover helps maintain moisture, but you must also monitor the temperature closely to avoid overcooking.