

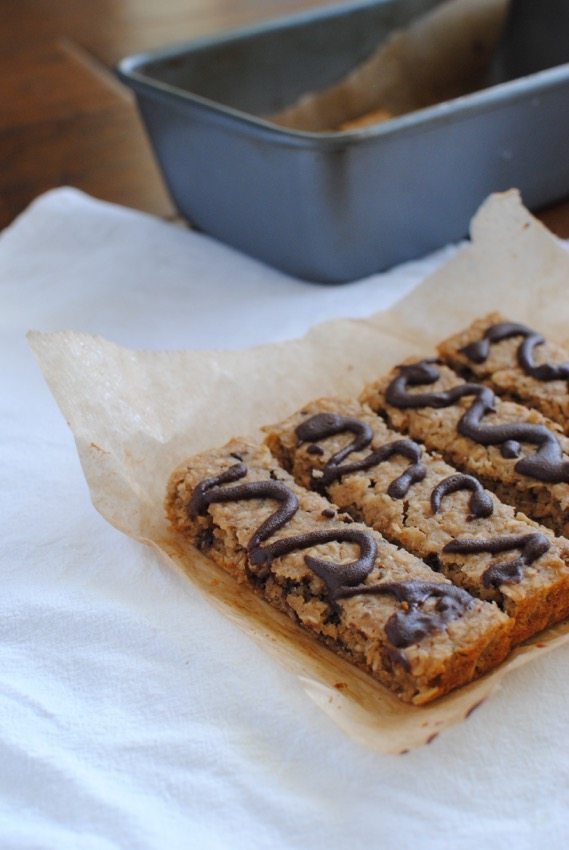
Are you ready to make a delicious treat that’s simple and satisfying? The Z Bar recipe is exactly what you need.
Whether you want a quick snack or a sweet reward, this recipe will become your new favorite. Imagine biting into a bar that’s packed with flavor and easy to prepare. Keep reading, and you’ll discover how to make these tasty bars step-by-step.
Your taste buds will thank you!

Credit: thehomrichhome.com
Ingredients Needed
Gathering the right ingredients is key to making delicious Z Bars. Each ingredient plays a role in the taste and texture. Using fresh and quality items makes a big difference.
The ingredients are divided into three groups: dry, wet, and optional add-ins. This helps keep the recipe clear and easy to follow.
Dry Ingredients
- Rolled oats – the base for chewy texture
- All-purpose flour – adds structure
- Brown sugar – gives sweetness and moisture
- Baking powder – helps the bars rise slightly
- Salt – balances flavors
- Cinnamon – adds warmth and spice
Wet Ingredients
- Butter – provides richness and binds ingredients
- Honey – natural sweetener that keeps bars soft
- Vanilla extract – enhances overall flavor
- Egg – helps hold the bars together
Optional Add-ins
- Chopped nuts – for crunch and extra nutrition
- Dried fruits – add natural sweetness and chewiness
- Chocolate chips – for a sweet, melty surprise
- Seeds like chia or flax – boost fiber and texture
Step-by-step Preparation
Making Z Bars at home is simple and fun. Follow these clear steps to prepare tasty bars. Each step guides you to get the best results with ease.
Mixing The Ingredients
Start by gathering all ingredients. Use oats, nuts, honey, and dried fruits. Combine them in a large bowl. Stir well to mix everything evenly. Make sure no clumps remain. The mixture should be sticky but manageable.
Shaping The Bars
Line a pan with parchment paper. Pour the mixture into the pan. Press it firmly to form an even layer. Use the back of a spoon or your hands. Shape the mixture into a flat rectangle. Keep the thickness about one inch.
Setting And Storing
Place the pan in the fridge. Let the bars set for at least two hours. This helps them hold their shape. After setting, cut into bar shapes. Store bars in an airtight container. Keep them cool for freshness.
Tips For Customization
Customizing your Z Bar recipe lets you enjoy new tastes and benefits. Small changes can make a big difference in flavor and nutrition. You can tailor the bars to suit your mood, needs, or diet. Experimenting is easy and fun. Here are some tips to help you customize your Z Bars.
Flavor Variations
Try different nuts like almonds, cashews, or pecans for new tastes. Add dried fruits such as cranberries, apricots, or raisins to sweeten naturally. Use spices like cinnamon, nutmeg, or ginger to add warmth. Chocolate chips or cocoa powder create a rich flavor. A pinch of sea salt can enhance all flavors.
Nutritional Boosters
Boost nutrition by adding chia seeds or flaxseeds for omega-3 fats. Use protein powder to increase protein content. Add oats or quinoa for extra fiber and texture. Coconut flakes add healthy fats and a tropical taste. Superfoods like goji berries or hemp seeds add antioxidants.
Dietary Adjustments
Make your Z Bars gluten-free by using certified gluten-free oats. For vegan bars, avoid honey and use maple syrup or agave. Use nut butters like sunflower seed butter for nut allergies. Adjust sweetness by reducing sugar or using natural sweeteners. Keep bars low-carb by replacing oats with nuts and seeds only.
Credit: eating-made-easy.com
Benefits Of Homemade Energy Bars
Making your own energy bars at home offers many benefits. You control the ingredients and flavors. You avoid preservatives and added sugars. Homemade bars give you energy and nutrition exactly how you want them.
These bars also save money and save time. They fit your schedule and taste preferences. Below are key benefits of homemade energy bars.
Health Advantages
Homemade energy bars use fresh, natural ingredients. You add nuts, seeds, and dried fruits. This boosts vitamins, minerals, and fiber. You avoid artificial colors and chemicals. Each bar supports better health and steady energy.
Cost Savings
Buying ingredients in bulk costs less. You spend less than store-bought bars. No extra fees for packaging or brand names. Homemade bars stretch your food budget further. You get more bars for less money.
Convenience
You make bars in advance and store them. Grab a bar anytime for a quick snack. No need to stop at stores or gas stations. Perfect for busy days, workouts, or travel. Ready-to-eat bars save time and effort.

Credit: www.youtube.com
Frequently Asked Questions
What Ingredients Are Needed For A Z Bar Recipe?
The Z Bar recipe requires oats, peanut butter, honey, chocolate chips, and vanilla extract. These ingredients blend for a tasty, healthy snack.
How Do You Make Z Bars Step-by-step?
Mix oats, peanut butter, honey, and vanilla. Press into a pan, sprinkle chocolate chips, chill, then cut into bars.
Are Z Bars Healthy And Nutritious?
Yes, Z Bars offer fiber, protein, and healthy fats. They are a good energy-boosting snack without added preservatives.
Can Z Bars Be Customized With Other Ingredients?
Absolutely! You can add nuts, dried fruits, or seeds to tailor the bars to your taste and nutrition needs.
Conclusion
This Z Bar recipe is simple and tasty. You can make it quickly at home. It uses easy ingredients you likely have. Perfect for a sweet treat or snack. Try this recipe to enjoy a homemade dessert. Share it with family or friends.
Cooking can be fun and rewarding. Give this recipe a chance today. You will enjoy every bite, for sure.