

Cleaning and descaling a coffee maker is essential for keeping your machine working well and making great-tasting coffee. Over time, mineral buildup and leftover coffee oils can affect both the flavor and the performance of the machine. A quick cleaning takes just a few minutes, while descaling, which removes mineral deposits, should be done a few times a year to protect the machine.
Many people don’t realize that regular cleaning not only improves taste but also helps prevent germs and keeps the coffee maker running longer. Different machines may need slightly different care, but the basics involve cleaning the brew basket, carafe, and running a descaling solution through the system.
By following a clear cleaning routine and descaling schedule, users can enjoy fresh coffee every day without trouble. This guide will show how to clean and descale a coffee maker easily, with tips to keep it performing at its best.
Key Takeways
- Regular cleaning improves coffee taste and machine performance.
- Descaling removes mineral buildup that can harm the coffee maker.
- A simple routine keeps the machine clean and extends its lifespan.
Why Cleaning and Descaling Your Coffee Maker Is Essential
Regular cleaning and descaling keep a coffee maker working well. They help keep the flavors pure, stop mineral buildup, and protect the machine from damage. This maintenance helps ensure each cup is fresh and the machine lasts longer.
Impact on Brew Quality
When a coffee maker isn’t cleaned, leftover coffee oils and residue can build up. These residues turn stale and affect the coffee’s taste. The result is a bitter or off-flavor that spoils the brew quality.
Cleaning removes oils and trapped coffee grounds that cause this bad taste. Descaling helps remove mineral deposits that block water flow. Both help the machine deliver water at the right temperature and pressure, which are key for good flavor.
Preventing Mineral Buildup
Mineral buildup, or scale, forms when water with minerals like calcium and magnesium heats up inside the machine. Over time, this scale blocks pipes and parts, reducing water flow.
Hard water areas cause faster buildup, so machines there need more frequent descaling. Using a descaling solution, often with vinegar or a special powder, breaks down these deposits. Removing scale keeps the machine running smoothly and stops leaks or clogs.
Extending Appliance Lifespan
Neglecting cleaning and descaling can cause parts to fail sooner. Scale and residue make the heating element work harder, which may lead to breakdowns or inaccurate water temperatures.
Regular maintenance reduces wear and tear. This prevents costly repairs and keeps the coffee maker functioning for years. Machines with routine cleaning often stay efficient and reliable longer than those that don’t get cleaned.
How Often Should You Clean and Descale
Regular cleaning and descaling keep a coffee maker working well and improve the taste of coffee. Knowing when to clean and descale helps avoid build-up that affects machine performance and flavor. The timing depends on daily use and water quality.
Recommended Cleaning Frequency
For daily maintenance, the coffee maker should be rinsed and wiped to remove leftover coffee oils and grounds. A deeper cleaning, using a cleaning powder or solution, is recommended every 1 to 2 weeks. This removes stubborn coffee oils that can build up and create bad tastes.
Descaling depends on the hardness of the water. If using hard water, descaling is typically needed every 1 to 3 months. In areas with soft water, it can be done less often, around every 3 to 6 months. Following this schedule can prevent mineral build-up that clogs the machine and affects brewing.
Signs Your Coffee Maker Needs Descaling
There are clear signs a coffee maker requires descaling. If the coffee takes longer to brew than usual, mineral deposits could be slowing water flow. White or chalky build-up around the machine’s water reservoir or heating element is also a sign.
Another sign is a change in taste, such as bitterness or sourness not caused by the coffee beans. Unexpected noises during brewing or leaks can indicate mineral blockage. Recognizing these signs early helps avoid damage and ensures coffee quality stays consistent.
Preparing to Clean and Descale a Coffee Maker
Proper preparation ensures the cleaning and descaling process is effective and safe. It involves gathering the right tools and understanding necessary precautions to avoid damage or injury.
Essential Supplies
To clean and descale a coffee maker, basic supplies are needed. These include:
- Descaling solution or white vinegar: For removing mineral buildup inside the machine.
- Water: To dilute the descaling agent and rinse the machine afterward.
- Coffee maker cleaning powder or tablets: Useful for eliminating leftover coffee oils and stains.
- Soft cloth or sponge: For wiping external surfaces and removable parts.
- Measuring cup: To mix cleaning solutions accurately.
Using approved products specific to coffee machines is important. Homemade solutions like a mix of equal parts white vinegar and water work well for descaling but may leave a smell that must be rinsed out thoroughly. Avoid harsh chemicals that can damage components or affect coffee taste.
Safety Precautions
Before starting, the coffee maker should be unplugged and cooled down. This prevents electric shock and burns from hot surfaces or leftover water.
It’s essential to follow the manufacturer’s instructions. Different models have unique parts and cleaning recommendations that affect how to clean and descale them safely.
Ensure proper ventilation when using vinegar or commercial descalers, as fumes can be strong. Avoid ingesting any cleaning solutions, and keep all supplies out of reach of children and pets.
Finally, after descaling, run multiple rinse cycles with clean water to remove any leftover residues that might harm health or spoil coffee flavor.
Step-by-Step Guide: Cleaning Your Coffee Maker

Cleaning a coffee maker involves removing and washing parts that collect coffee oils and grounds. It also requires wiping down the outside to keep the machine hygienic and looking good. Both steps help maintain the machine’s performance and the taste of brewed coffee.
Cleaning Removable Parts
Start by unplugging the coffee maker. Then remove parts like the carafe, brew basket, and any reusable filters. These pieces collect coffee residue and should be washed after each use with warm, soapy water.
Rinse them thoroughly to remove any soap. For a deeper clean, soak these parts in a solution of equal parts water and white vinegar for about 15 minutes. This removes built-up oils and odors.
After washing, dry all parts completely. Some machines have dishwasher-safe components — check the user manual before placing parts in the dishwasher. Keeping removable parts clean prevents buildup that can affect flavor.
Wiping External Surfaces
Use a soft, damp cloth to wipe the outside of the coffee maker. Focus on areas like the water reservoir lid, control panel, and warming plate.
Avoid harsh chemicals or abrasive pads, as these can damage surfaces. For sticky spots, a mild dish soap diluted in water works well.
Regularly wiping down the exterior helps avoid stains and dust buildup. It also keeps buttons and panels functioning smoothly. Be careful to keep water away from electrical parts while cleaning.
Descaling: Removing Mineral Deposits
Mineral buildup inside a coffee maker can slow brewing and affect the taste of coffee. Removing these deposits requires the right solution, a specific cleaning process, and proper rinsing to protect the machine and maintain brewing quality.
Choosing a Descaling Solution
A good descaling solution breaks down calcium and magnesium deposits. Commercial descaling products are made for coffee makers and usually come with clear instructions. They are effective and safe for most machines.
Vinegar is a common household alternative that works well. It is acidic and can dissolve mineral buildup but might leave a mild odor. Citric acid is another option, often used as a powder mixed with water.
Baking soda should be avoided for descaling because it is alkaline and will not dissolve mineral deposits effectively.
Descaling Instructions
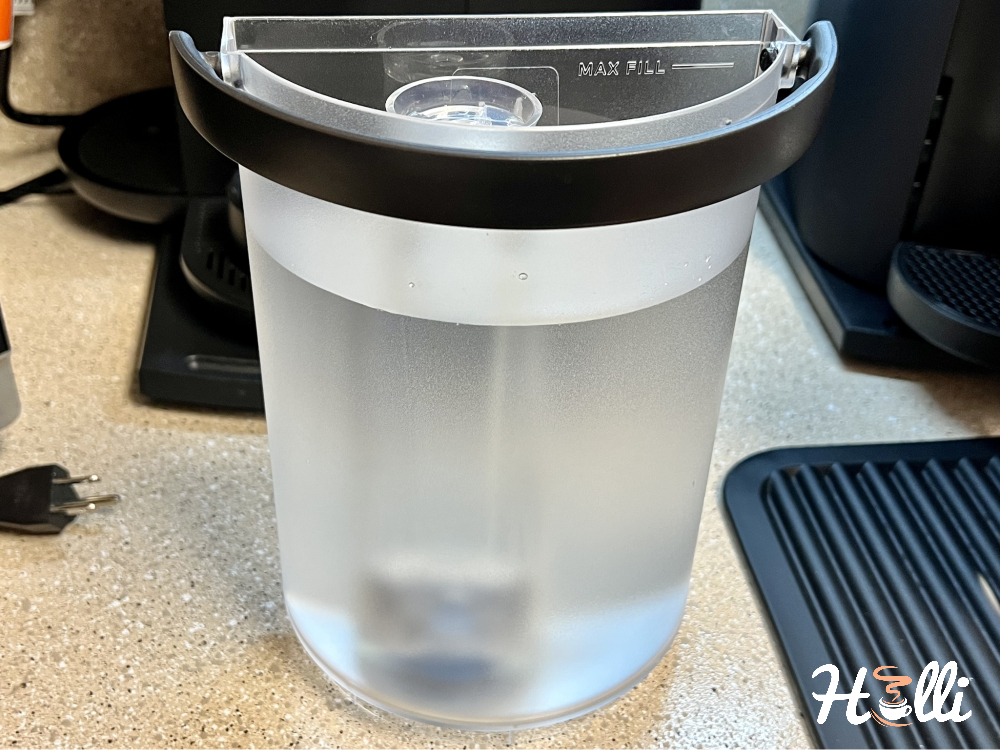
To descale, first empty the machine and remove any coffee grounds or filters. Mix the descaling solution according to the product instructions or prepare a solution of one part white vinegar to two parts water.
Pour the solution into the water reservoir. Start a full brewing cycle but pause it halfway so the solution can soak in the internal parts. After 30 minutes, complete the cycle.
For machines with a descaling program, follow the manufacturer’s steps, which often include running the solution through the cycle automatically.
Rinsing and Final Steps
After descaling, it’s crucial to flush the machine to remove any leftover solution and taste residue.
Fill the water reservoir with clean water and run at least two full brewing cycles without coffee grounds.
Check the water reservoir and machine for any remaining deposits or odors.
Regular rinsing after descaling keeps the machine clean and ready for use.
Special Cleaning Instructions by Coffee Maker Type
Different types of coffee makers need specific cleaning steps to keep them working well. This includes how to clean parts like water reservoirs, carafes, and brewing units. Proper descaling is also important to remove mineral buildup.
Cleaning a Drip Coffee Maker
Drip coffee makers should be cleaned after every use by washing the carafe and filter basket with warm, soapy water. The water reservoir can be wiped with a damp cloth.
For deep cleaning, run a mixture of equal parts vinegar and water through the machine. After this, run two or three cycles of clean water to remove any vinegar taste. Descaling should be done every 3-6 months or sooner if water is hard.
Regular cleaning prevents clogged tubes and keeps coffee tasting fresh.
Descaling a Single-Serve Coffee Maker
Single-serve machines, like pod brewers, need descaling about every 2-3 months. Use a descaling solution or a vinegar-water mix, following the manufacturer’s instructions.
Remove the pod holder and clean it with warm water. Run the descaling solution through the machine without a pod. After descaling, flush the machine with two to three clean water cycles.
Wiping the exterior and drip tray regularly helps maintain the machine’s condition.
Tips for Espresso Machines
Espresso machines require more precise cleaning of the portafilter, group head, and steam wand. After each use, rinse the portafilter and wipe the steam wand.
Backflushing with a cleaning detergent designed for espresso machines should be done weekly. Descale the machine every 1-3 months depending on water hardness.
Use a brush to clean hard-to-reach areas. Avoid harsh chemicals that can damage seals and internal parts.
Troubleshooting Common Issues After Cleaning
Some problems may still occur after cleaning a coffee maker. These often relate to leftover flavors or disruptions in the brewing process. Addressing these issues quickly helps maintain the machine’s performance and coffee quality.
Persistent Odors or Tastes
If coffee tastes sour or has a vinegar smell after cleaning, it means the machine wasn’t fully rinsed. Residual vinegar or cleaning solutions can affect the flavor. To fix this, run several cycles with just clean water. This flushes out any leftover cleaning agents.
Old coffee oils or mineral buildup inside the machine can also cause strange tastes or smells. Even after cleaning, stubborn residues may remain in hidden parts. In that case, disassemble removable parts and clean them separately. Soaking these parts in warm, soapy water can help remove oils.
Regular maintenance and thorough rinsing after each cleaning prevent persistent odors and flavors from returning.
Incomplete Brewing Cycles
If the coffee maker stops brewing before finishing, this might be due to clogged components or improper cleaning. Mineral deposits can block water flow even after descaling, especially in tight areas like the drip tube or valves.
Check and clean filters, hoses, and the water reservoir to ensure no buildup blocks water movement. Sometimes, coffee grounds stuck under lids or seals can prevent the machine from closing properly, causing the brew cycle to stop.
If cleaning doesn’t fix the issue, inspecting electrical components such as the water pump may be necessary. Regular cleaning combined with proper part inspection helps prevent incomplete brewing problems.
Best Practices for Coffee Maker Maintenance
Maintaining a coffee maker requires both daily attention and occasional deeper care. Simple cleaning habits prevent buildup and keep coffee tasting fresh. Long-term steps protect the machine’s parts and extend its useful life.
Daily Cleaning Habits
After each use, rinse the coffee pot and removable parts with warm, soapy water. This removes leftover coffee oils that can affect taste. Wipe down the machine’s exterior and the warming plate to prevent stains and sticky residue.
The coffee filter basket should be emptied and rinsed every day. If a reusable filter is used, clean it thoroughly to avoid clogging. Emptying the grounds promptly also stops mold and bacteria growth.
Daily cleaning takes less than five minutes but helps keep the machine running smoothly and coffee tasting good.
Long-Term Care Tips
Descaling should happen every 1 to 3 months depending on water hardness and usage. Run a solution of white vinegar and water through the machine to break down mineral buildup inside. Follow this with two cycles of plain water to rinse thoroughly.
Check and clean the water reservoir regularly to avoid deposits and germs. Inspect machine parts for wear, like the rubber seals and drip tray.
Replacing filters and parts as recommended ensures consistent performance. Regular long-term care prevents costly repairs and keeps the coffee maker working well for years.
Eco-Friendly Alternatives for Cleaning and Descaling
Many people prefer using eco-friendly products to clean and descale their coffee makers. These options avoid harsh chemicals and often use ingredients already found at home.
One common solution is a mix of equal parts white vinegar and water. This combination breaks down limescale effectively. It is gentle on the machine and safe for regular use.
Another natural option is lemon juice mixed with water. The mild acidity in lemon helps remove buildup and leaves a fresh scent. It can be used in the same way as vinegar.
Baking soda is also useful, especially for scrubbing removable parts. When made into a paste with water, it helps clean stubborn stains without scratching surfaces.
Some people use denture tablets dissolved in water. This method clears mineral deposits and sanitizes the parts. It is a safe and chemical-free approach.
Here is a quick comparison of these eco-friendly options:
| Ingredient | Use | Benefits |
|---|---|---|
| White Vinegar | Descale with water mix | Powerful, kills limescale |
| Lemon Juice | Descale with water mix | Fresh smell, mild acid |
| Baking Soda | Scrub removable parts | Gentle abrasive, non-toxic |
| Denture Tablets | Soak removable parts | Cleans, disinfects |
These alternatives help maintain the coffee maker’s function by preventing limescale buildup without harming the environment.
When to Replace Your Coffee Maker
Most coffee makers last between 5 to 10 years. The exact time depends on how often it is used, its build quality, and how well it is maintained.
If the coffee tastes bland or the machine brews much slower than usual, these may be signs it’s time for a new coffee maker. Unpleasant odors or leaks are also strong indicators.
Here are some clear signs to look for:
- Broken parts that affect performance or safety
- Frequent malfunctions despite repairs
- Heavy mineral buildup that cleaning can’t remove
- Poor coffee quality even after descaling
Using filtered water and regular cleaning can extend the life of the machine, but some wear is normal over time.
If the machine needs frequent repairs or no longer meets your coffee needs, replacing it is often more cost-effective. A newer model may offer improved features and better brewing quality.
FAQs
What is the difference between cleaning and descaling a coffee maker?
Cleaning removes coffee oils and residue that build up inside the machine. Descaling removes mineral deposits caused by hard water. Both steps help keep the machine working well.
How often should a coffee maker be descaled?
Descaling is usually needed a few times a year. The exact number depends on the water hardness and how often the machine is used.
Can vinegar be used to descale a coffee maker?
Yes, white vinegar is a common and effective natural solution. It helps dissolve mineral buildup. However, some people prefer commercial descaling powders for a stronger, faster result.
How long does descaling take?
The process can take between 30 minutes to an hour, depending on the machine and method used.
Should the coffee maker be cleaned after descaling?
Yes, after descaling, the water reservoir must be rinsed thoroughly. Running one or two cycles with fresh water helps remove any leftover descaling solution or vinegar taste.
Can hard water damage a coffee maker?
Yes, hard water causes mineral deposits that can slow down the machine and affect coffee flavor. Regular descaling helps prevent this issue.
Conclusion
Regular cleaning and descaling keep a coffee maker working well and improve the taste of the coffee. It helps remove mineral buildup and coffee oils that can affect flavor and machine performance.
Descaling should be done every few months, depending on water hardness and use. Daily cleaning takes only a few minutes but is important to prevent germs and residue.
Using the right cleaning solution and following the machine’s instructions ensures safe and effective care. Vinegar or specialized descaling powders work well for removing scale and buildup.
A clean coffee maker lasts longer, brews better coffee, and runs more smoothly. Maintenance like this saves time and money by avoiding repairs or replacements.
Key points to remember:
- Clean daily with warm water and mild detergent
- Descale every 2-3 months or as needed
- Rinse well to avoid leftover solution taste
- Follow manufacturer directions for cleaning products
By sticking to these steps, anyone can keep their coffee maker in good shape and enjoy fresh, flavorful coffee each day.