
What Is The Best Way To Cook Corn On The Cob? It’s not just about boiling it until it’s soft, your ideal method depends on what you’re after: speed, smoky flavor, or that perfect balance of sweet and tender. Some swear by the grill for charred edges, others rely on the microwave for a 3-minute dinner fix, and a few still drop ears straight into salted water like their grandmothers did. The truth is, there’s no single “best” way, only the best way for your situation.
In our research, we found that cooking time varies wildly by method: microwaving takes just 3, 4 minutes per ear, while grilling can run 10, 15 minutes but delivers complex flavor. Per USDA guidelines, corn should reach an internal temperature of at least 165°F (74°C) to ensure safety without overcooking. Let’s break down your options so you can pick the right one fast.
Why the "Best" Way Depends on Your Goals
Not all corn on the cob is created equal, and neither are the people eating it. If you’re hosting a backyard BBQ, you’ll want something with visual appeal and smoky depth. If you’re feeding hungry kids after soccer practice, speed and ease trump everything else. Even the type of corn matters: fresh-picked summer ears hold moisture better than frozen ones, which need gentle handling to avoid sogginess.
Your kitchen setup, time, and taste preferences all shape what “best” really means here.
The 5 Main Ways to Cook Corn on the Cob
There are five widely used methods, each with loyal followers, and good reasons why. Boiling is the old standby, grilling adds drama, microwaving wins on convenience, roasting deepens sweetness, and steaming keeps things light and healthy. None are inherently superior; they just serve different needs. Below, we’ll walk through each one, including how they affect texture, flavor, and prep time.
Boiling: The Classic Reliable Method
Drop shucked ears into a large pot of rapidly boiling water, and in under ten minutes, you’ve got tender, juicy corn. This method works especially well with fresh summer corn because it locks in natural sugars without drying out the kernels. Add a pinch of salt to the water, not for seasoning the corn directly, but to help maintain boiling temperature when the cold ears go in.
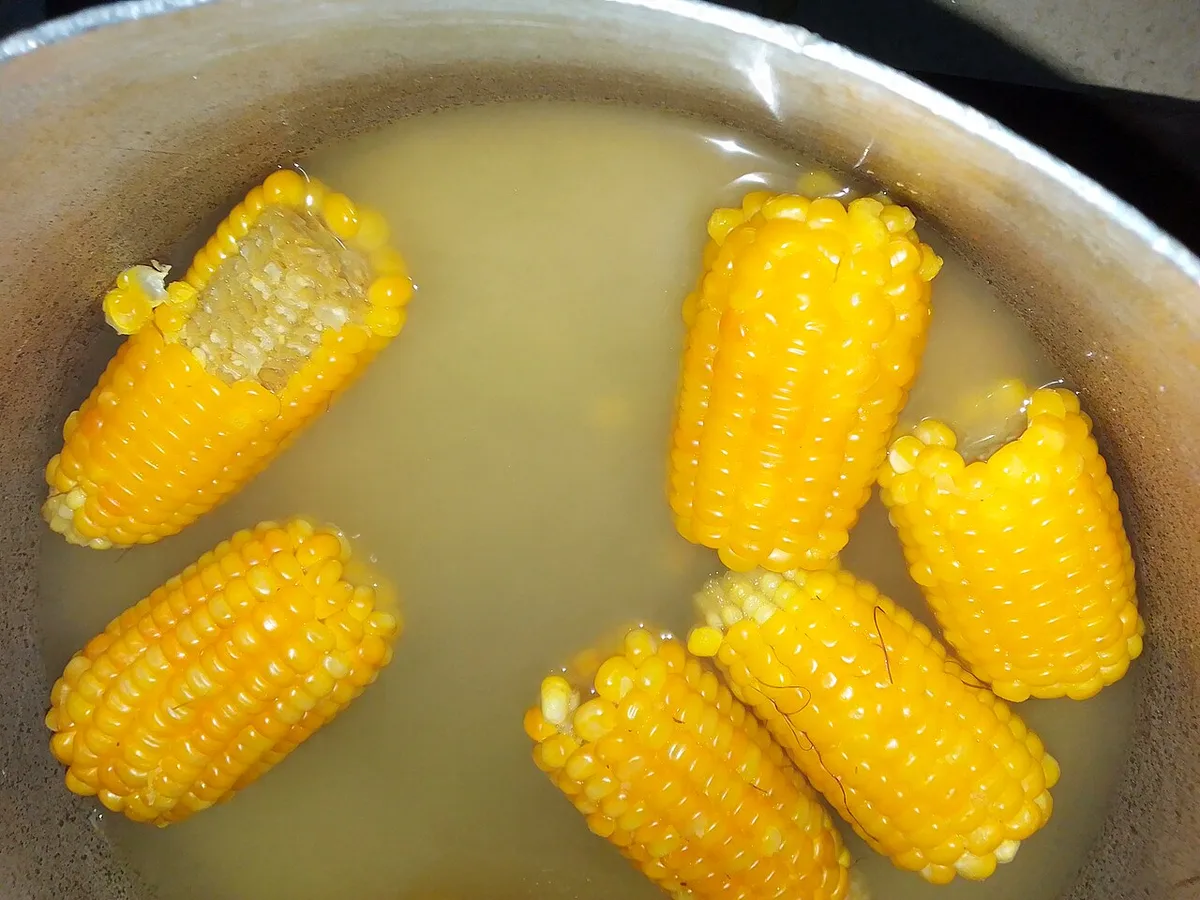
- Time: 4, 6 minutes for fresh, 8, 10 for frozen
- Best for: Weeknight meals, large batches, traditional flavor
- Watch out for: Overcooking (mushy kernels), inconsistent heat if pot is too small
Pro tip: Don’t add sugar to the water, it can toughen the kernels. Just use plenty of water so temperature doesn’t drop too much when corn is added.
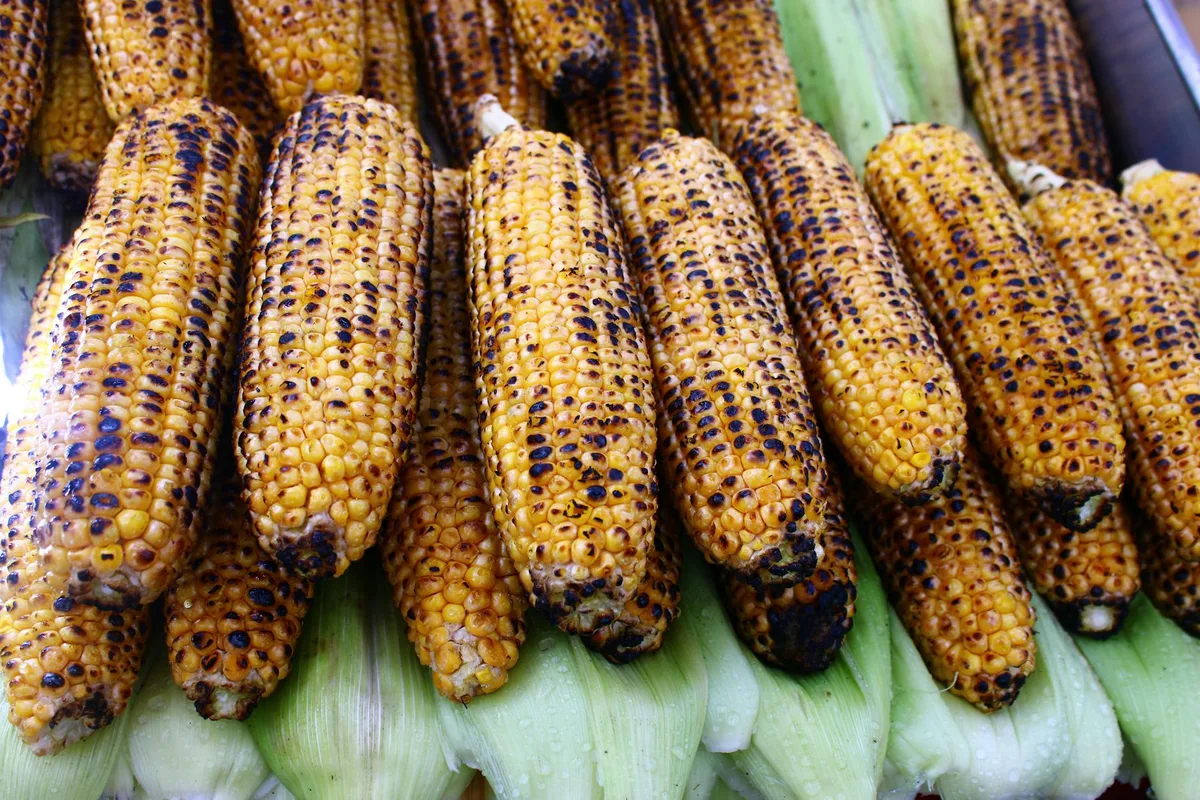
Grilling: For Smoky, Charred Flavor
Grilling transforms corn into something almost caramelized, with crisp edges and a subtle smokiness that pairs perfectly with butter and lime. You can grill husked or unhusked, but if leaving the husk on, soak it in water for 15, 30 minutes first to prevent burning. Direct heat at 375, 450°F (190, 230°C) gives the best results.
- Time: 10, 15 minutes, turning every 3, 4 minutes
- Best for: Summer cookouts, flavor-focused dishes, elote-style toppings
- Watch out for: Dry husks catching fire, undercooked centers if heat is too low
For extra ease, peel back the husk (without removing it), remove silk, rub with butter and spices, then fold the husk back up before grilling. This keeps moisture in while letting smoke flavor penetrate.
Microwaving: Fastest for Busy Nights
When time is tight, the microwave is your secret weapon. Place a single ear (husk removed) on a microwave-safe plate, cover with a damp paper towel, and cook on high. The steam from the towel keeps kernels plump and prevents rubberiness, a common microwaving mistake.
- Time: 3, 4 minutes per ear (rotate halfway)
- Best for: Solo meals, office lunches, last-minute sides
- Watch out for: Hot spots causing uneven cooking, soggy texture if over-covered
As of 2026, most home microwaves run 800, 1000W, which is ideal for this method. For multiple ears, add 1, 2 minutes per extra cob and arrange them in a circle.
Roasting: Deep, Caramelized Sweetness
Roasting in the oven concentrates corn’s natural sugars, giving it a richer, almost nutty flavor. Peel back the husk, remove silk, brush with oil or butter, and wrap loosely before placing on a baking sheet. Roast at 400°F (200°C) until tender and lightly browned.
- Time: 20, 25 minutes
- Best for: Meal prep, deeper flavor without grill access
- Watch out for: Drying out if unwrapped, uneven browning on lower racks
This method shines in fall and winter when grilling isn’t practical. It also works great for flavored butters, infuse your fat with herbs before brushing on.
Steaming: Gentle and Nutrient-Preserving
Steaming uses moist heat to cook corn evenly without leaching nutrients into water. Use a steamer basket over boiling water or a dedicated electric steamer. Keep the lid on to trap steam, this prevents kernels from drying out.
- Time: 5, 7 minutes
- Best for: Health-conscious cooks, preserving vitamin content
- Watch out for: Undercooking if water isn’t boiling vigorously
Steamed corn tastes clean and sweet, making it ideal if you plan to add bold toppings like chili-lime seasoning or cotija cheese later.
Side-by-Side Comparison: Time, Flavor, and Texture
Let’s put the five methods head-to-head. Boiling is fastest for large batches but can dilute subtle sweetness if overdone. Grilling delivers unmatched smokiness but needs attention to avoid charred husks or undercooked centers. Microwaving wins on speed, just 3, 4 minutes, but risks uneven texture if you skip the damp towel trick.
Roasting builds deep caramel notes yet takes twice as long as boiling. Steaming preserves nutrients and moisture but lacks browning. Below’s a quick reference:
| Method | Active Time | Total Time | Flavor Profile | Texture |
|---|---|---|---|---|
| Boiling | 2 min | 6–10 min | Clean, sweet | Tender, juicy |
| Grilling | 5 min | 10–15 min | Smoky, charred | Crisp edges, soft inside |
| Microwaving | 1 min | 3–5 min | Mild, fresh | Plump, even |
| Roasting | 3 min | 20–25 min | Rich, caramelized | Slightly dry exterior |
| Steaming | 2 min | 5–7 min | Light, pure | Delicate, moist |
Choose based on what you value most: speed, flavor complexity, or texture control.
Best Method for Your Situation
Your kitchen, schedule, and meal context dictate the right pick. Don’t force a grill method on a Tuesday night if you’re solo and tired, microwaving gets you there faster with less cleanup. Likewise, don’t boil corn for a summer party if you want wow factor; grilled ears with lime and chili will steal the show.
Weeknight Dinner? Try This
If you’re cooking for one or two after work, microwaving is hard to beat. It’s consistent, nearly foolproof, and leaves no pots to scrub. Just remember the damp paper towel, it’s the difference between rubbery and perfectly tender. For slightly more effort with better flavor, steaming takes only a few extra minutes and keeps kernels vibrant.
Summer BBQ? Go With This
Grilling is the star here. The char adds visual appeal and depth that boiled corn can’t match. Soak husks if leaving them on, or go husk-off with a light oil brush to prevent sticking. Serve with flavored butters or cotija cheese for crowd-pleasing flair.
Roasting works too if you’re indoors but still want that caramelized edge.
Camping or Outdoor Cooking? Here’s How
Over a campfire or portable grill, husk-on roasting is ideal. No pots, no cleanup, just wrap ears in foil with a pat of butter and toss them near the coals. Rotate every 5 minutes until tender (about 15, 20 minutes total). No soaking needed outdoors; the foil traps steam naturally.
Health-First Approach? This Wins
Steaming tops the list for nutrient retention. It doesn’t leach water-soluble vitamins like boiling can, and it needs no added fat. If you’re watching calories or sodium, skip the butter station and season with herbs, lemon zest, or a sprinkle of nutritional yeast instead.
Common Mistakes That Ruin Corn
Even simple methods go wrong if you overlook key details. Overcooking is the biggest culprit, corn doesn’t improve past tender. Once kernels lose their snap, they turn mealy. Another frequent error: skipping the silk removal.
Those fine threads cling stubbornly and ruin the eating experience, no matter how perfectly cooked the kernels are.
Using cold water to start boiling slows everything down. Always bring water to a full rolling boil before adding corn. And don’t overcrowd the pot, each ear needs room so temperature stays steady. With microwaving, forgetting the damp cover leads to dry, chewy results.
Finally, never salt water heavily thinking it seasons the corn; it barely penetrates the husk and just wastes salt.
Pro Tips for Perfect Kernels Every Time
Small tweaks make a big difference. For boiling, add a splash of milk or cream to the water, it helps buffer pH and keeps kernels plumper. When grilling, rotate ears frequently to prevent flare-ups from dripping butter. With microwaving, arrange multiple ears in a circle, not stacked, for even exposure.
Always shuck corn just before cooking. Left exposed, kernels dehydrate and lose sweetness fast. If using frozen corn, thaw it in the fridge overnight rather than at room temperature to avoid sogginess. And for serving, corn holders aren’t just cute, they keep hands clean and make butter application way easier.