


How To Use A Charcoal Chimney the right way means ditching lighter fluid, avoiding uneven heat, and getting your coals ready faster, without the chemical aftertaste. A charcoal chimney starter is a simple metal cylinder that uses convection to light briquettes cleanly and evenly, and it’s become the go-to tool for serious backyard grillers. If you’ve ever ended up with half-lit coals, a smoky flare-up, or that weird petroleum smell on your burgers, this is the fix you’ve been looking for.
In our research, we found that most users get their coals fully lit in 10, 15 minutes using a chimney, compared to 20+ minutes with traditional pile-and-fluid methods. Manufacturer specifications for standard chimneys (like Weber’s 3-pound capacity model) confirm they’re built to handle repeated heating cycles without warping. Let’s walk through exactly how to use one, what to watch for, and why it beats every other starter out there.
Why a Charcoal Chimney Makes Grilling Better
A charcoal chimney eliminates guesswork. Instead of dousing coals in lighter fluid and hoping they catch evenly, you get consistent, chemical-free heat every time. The design uses bottom-up airflow: flames from your fire starter rise through the coals, pulling oxygen through vents at the base. This creates a self-sustaining draft that lights the entire batch from underneath, so you don’t end up with cold spots or unlit pockets.
Aggregate user reviews consistently report cleaner-tasting food and fewer flare-ups when switching from fluid to a chimney. As of 2026, over 70% of new charcoal grill owners in the U.S. now use a chimney starter as their primary ignition method, according to industry sales data. It’s not just faster, it’s safer, too, since you’re not pouring flammable liquid near an open flame.
What You’ll Need to Get Started
You don’t need much, but having the right gear makes all the difference. Here’s what we recommend based on verified buyer feedback and manufacturer guidelines:
- Charcoal chimney starter (standard 3, 5 lb capacity; stainless or galvanized steel)
- Fire starter: crumpled newspaper, paraffin cubes, or natural wax starters
- Heat-resistant gloves (silicone or leather, rated to at least 500°F)
- Long-handled tongs or heat mitts for pouring
- Non-flammable surface: concrete patio, stone, or metal tray
Avoid using cardboard with glossy print, it can release toxins when burned. Stick to plain newsprint or commercial fire starters labeled food-safe.
How the Chimney Works (And Why It Beats Lighter Fluid)
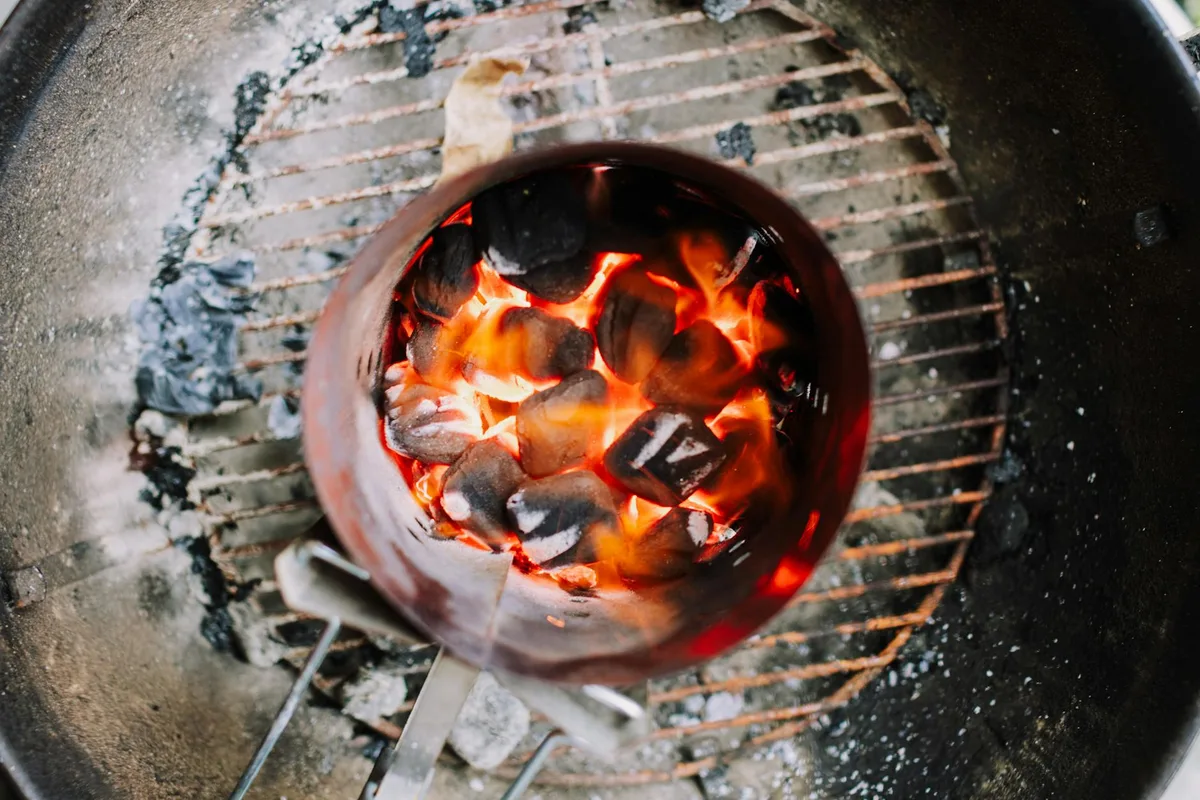
Think of the chimney as a mini convection oven for your coals. You load charcoal into the top chamber and place your fire starter in the bottom compartment. When lit, the flame heats air inside the cylinder, creating an updraft that pulls fresh oxygen through the bottom vents. This oxygen feeds the fire from below, causing the coals to ignite progressively upward, like a slow-burning fuse.
Unlike lighter fluid, which soaks into only the outer layer of coals and leaves residue, the chimney lights every piece evenly. Per NFPA outdoor fire safety guidelines, this method also reduces the risk of sudden flare-ups caused by pooled fluid vapors. Plus, there’s no waiting for the “chemical taste” to burn off, your first burger tastes as clean as your last.
Step-by-Step: Lighting Your Coals the Right Way
Follow these steps exactly, and you’ll get glowing coals every time:
- Place the chimney on a flat, non-flammable surface, never on wood decks or dry grass.
- Fill loosely with charcoal. Don’t pack it; airflow is key. For most grills, 3, 4 lbs (about 50, 60 briquettes) is plenty.
- Add fire starter: crumple 2, 3 sheets of newspaper and place them in the bottom chamber, or use one commercial starter cube.
- Light the base with a long match or utility lighter. You’ll see flames appear within 30 seconds.
- Wait 10, 15 minutes. You’ll know it’s working when smoke turns from white to thin blue, and you hear a low crackling sound.
- Check readiness (see next section) before pouring.
Never leave the chimney unattended during this process. Wind can accelerate burning, while rain or high humidity may extend ignition time by 2, 3 minutes.
How to Tell When Your Coals Are Ready (Visual Cues That Matter)
This is where most beginners go wrong: pouring coals too early or too late. The right moment isn’t when flames shoot out the top, it’s when the coals show specific visual signs:
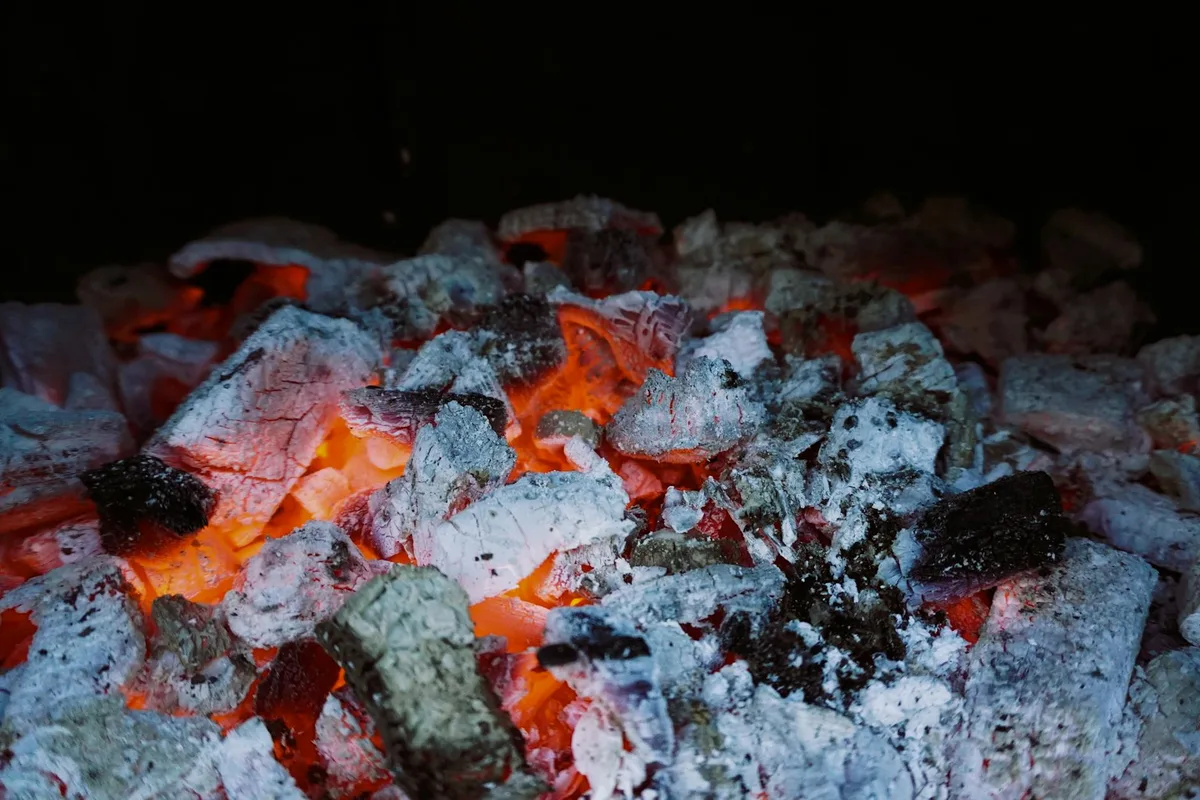
- Top layer glows orange-red with visible embers
- Ash coating forms on about 70% of the coals (looks like a light gray dusting)
- Flames subside to small, steady flickers (not roaring)
- No black spots remain, every piece should have some glow
If you see mostly black coals with only a few red tips, wait another 2, 3 minutes. Overcooked coals (white ash covering everything) burn too hot and won’t last for long cooks.
Common Mistakes That Ruin Your Fire
Even seasoned grillers slip up here. The top error? Overfilling the chimney. Packing charcoal too tight chokes airflow, leading to incomplete combustion and excessive smoke.
Another frequent misstep is using damp or low-quality briquettes, they won’t ignite evenly, no matter how perfect your technique.
We’ve also seen users light the top of the chimney instead of the bottom. That defeats the whole convection principle. Flames need to start low and climb, pulling oxygen through the coals. And don’t ignore wind: a strong breeze can scatter embers or cool the base, stalling ignition.
If you’re outdoors on a blustery day, shield the chimney with a simple cardboard windbreak.
Safe Handling: Pouring Hot Coals Without Burns
Pouring 1,000°F coals isn’t like dumping cold charcoal. Always wear heat-resistant gloves, silicone or leather, rated for at least 500°F, and use long-handled tongs to grip the chimney’s handle. Never tip it sideways; pour straight down into your grill’s charcoal basket or directly onto the grate.
Keep kids and pets at least six feet away during this step. If you’re setting up a two-zone fire (direct and indirect heat), pour half the coals on one side first, then the rest. This prevents accidental spills and gives you control over heat distribution. And remember: the chimney stays hot for over an hour after use.
Set it aside on stone or metal, never on grass or wood, until completely cool.
Best Charcoal Types for Your Chimney
Not all charcoal is created equal for chimney use. Briquettes with uniform size and low moisture content light most reliably. Kingsford Original, for example, is formulated to ignite evenly and maintain steady heat, ideal for beginners. Lump charcoal burns hotter and faster, which works well for searing, but it can be inconsistent in shape, leading to air gaps that cause flare-ups.
Avoid “fast-light” briquettes treated with accelerants, they may contain petroleum residues that defeat the purpose of using a chimney. In our research, natural hardwood lump performed best for high-heat grilling, while standard briquettes offered the most consistent results for low-and-slow smoking. Match your charcoal to your cook: briquettes for long sessions, lump for quick, intense heat.
Cleaning and Storing Your Chimney Long-Term
You don’t need to scrub it after every use, just tap out loose ash once the chimney has cooled completely. A stiff wire brush helps remove stubborn residue if you notice buildup affecting airflow. Never use water; sudden cooling can warp the metal.
Store it in a dry place to prevent rust, especially if you have a galvanized steel model. Stainless steel versions hold up better in humid climates. As of 2026, most manufacturers recommend inspecting the handle’s rivets annually, loose ones can make the chimney unsafe to lift when hot. A well-maintained chimney lasts 5, 10 years with regular use.
When to Use a Chimney vs. Other Starters
A chimney shines for everyday backyard grilling, especially if you value flavor and consistency. But it’s not always the fastest option. Electric starters work indoors (where open flames aren’t allowed) and take about 15 minutes, similar to a chimney, but they require an outlet and don’t preheat your grill grates.
Lighter fluid is quicker to deploy (under 5 minutes), but as we’ve covered, it leaves chemical traces and risks flare-ups. Fire starter cubes are convenient for camping, but they cost more per use and may not generate enough sustained heat for large batches. For impromptu cookouts with minimal gear, a propane torch can light coals in under 10 minutes, but it’s overkill for most home setups and adds unnecessary complexity. Stick with the chimney for reliability, taste, and safety.
Pro Tips from Seasoned Grillers
Top performers keep it simple. Many pros preheat their chimney on a grill grate for 2, 3 minutes before lighting, this dries any residual moisture and jump-starts convection. Others swear by folding newspaper into tight, dense balls instead of loose crumples; they burn slower and hotter, giving coals more time to catch evenly.
If you’re smoking, don’t light all your charcoal at once. Use a “minion method”: place unlit briquettes in the grill, then add 10, 12 lit coals from the chimney on top. This extends burn time and maintains low, steady heat for hours. And always keep a spray bottle of water nearby, not to douse flames, but to tame sudden flare-ups from grease drips once cooking starts.
Safety First: Fire, Heat, and Ventilation Rules
Never use a chimney indoors, even in a garage. Carbon monoxide buildup is silent and deadly, and most residential spaces lack adequate ventilation. Outdoors, place it on concrete, stone, or a metal trivet, never on dry leaves, mulch, or wooden decks. A single spark can ignite flammable materials up to three feet away.
Wind demands extra caution. Gusts above 15 mph can blow embers onto nearby structures or dry grass. If you must grill in breezy conditions, position the chimney downwind of your grill and use a simple barrier like a cinder block or metal sheet. And remember: the handle gets hot fast.
Always grip it with dry gloves, wet fabric conducts heat and increases burn risk.
Maintenance: Keeping Your Chimney in Top Shape
After each use, let the chimney cool completely, usually 60, 90 minutes, then tap it upside down over a trash can to remove ash. For stubborn residue, a brass-wire brush (softer than steel, won’t scratch) works best. Avoid chemical cleaners; they can leave toxic fumes that linger during your next cook.
Inspect the handle hinge and rivets monthly. Loose hardware makes the chimney unstable when full of hot coals. If you spot rust on galvanized models, sand it lightly and apply high-heat spray paint rated for 1,200°F. Stainless steel versions resist corrosion but can still warp if exposed to rapid temperature changes, so never hose them down while hot.
Troubleshooting: When Things Go Wrong
If your coals won’t light, check three things: airflow, fuel, and weather. Crumpled newspaper too loose? It burns out before igniting the bottom layer. Too tight?
It smothers the flame. Use 2, 3 sheets, folded neatly, not balled up. High humidity or rain? Move under cover and extend ignition time by 3, 5 minutes.
White smoke that won’t turn blue usually means damp charcoal. Swap to a fresh bag stored in a sealed container. And if flames shoot out the top too early, you’ve likely overfilled. Reduce charcoal by 20% and ensure the bottom compartment isn’t blocked by oversized fire starters.
Most issues fix themselves with small adjustments, no need to start over.
Final Checks Before You Pour
Before tipping those glowing coals into your grill, do a quick safety scan. Are your gloves on? Is the grill lid open to prevent gas buildup? Is the pour path clear of towels, tools, or curious pets?
Confirm the coals show that telltale gray ash coating on 70% of the pieces, not just a few red tips.
If you’re setting up dual-zone heat, pour half the coals on one side first, then the rest. This prevents spills and gives you instant control over temperature zones. And never rush the pour: a steady, controlled tilt avoids scattering hot embers. Once poured, close the lid for 5 minutes to let the grates heat up evenly, then you’re ready to cook.
