
Ever stare at fresh corn on the cob and wonder if there’s a way to cook it fast without a big pot of boiling water? You'll be happy to know that yes, you absolutely can make corn on the cob in the microwave, and it’s surprisingly good. This method leverages the microwave's efficiency to steam the corn quickly and with minimal fuss.
Recent research indicates that microwave cooking times for corn on the cob typically range from 3 to 6 minutes per batch, depending on your microwave's wattage and the number of ears being cooked. This speed makes it a prime candidate for busy weeknights. Let’s get into how this simple process works.
The Super-Fast Microwave Corn Method: A Simple Overview
This approach to cooking corn on the cob is all about efficiency and convenience. It’s designed to deliver tender, sweet kernels with a fraction of the effort involved in traditional boiling or grilling. The core principle relies on using the microwave's energy to generate steam within the corn's natural casing.
The general idea is to trap the moisture already present in the corn, allowing it to cook itself. You’re not adding extra water to boil or dealing with the heat of a grill; the microwave does all the heavy lifting. This makes it ideal when you need a quick side dish without a lot of cleanup.
Understanding How Microwave Corn Works: Steaming in its Own Jacket
The magic behind microwave corn lies in its ability to rapidly heat the water molecules within the cob and kernels. When the corn is placed in the microwave, typically either in its husk or wrapped tightly, the trapped moisture heats up and turns into steam. This steam then circulates around the kernels, cooking them evenly.
Manufacturer specifications for microwave ovens often highlight their ability to heat food rapidly through dielectric heating, where electromagnetic waves excite water molecules. When applied to corn on the cob, this generates internal steam pressure that effectively steams the kernels. This internal steaming process is what yields tender, full-flavored corn.
Method 1: Corn in the Husk – Your Easy Go-To
Cooking corn on the cob in its husk takes full advantage of the natural packaging. The husk acts as a protective barrier, sealing in the moisture and ensuring thorough steaming. It’s arguably the simplest method because it requires the least amount of prep work and also provides a natural handle for serving.
This technique is fantastic for busy cooks, as it significantly cuts down on prep time and cleanup. You’re essentially letting the corn steam itself within its own protective layer.
Step-by-Step: Microwaving Corn with Husks
Preparing corn on the cob using its natural husk involves just a few straightforward steps. The process prioritizes minimal intervention, allowing the microwave to do most of the work.
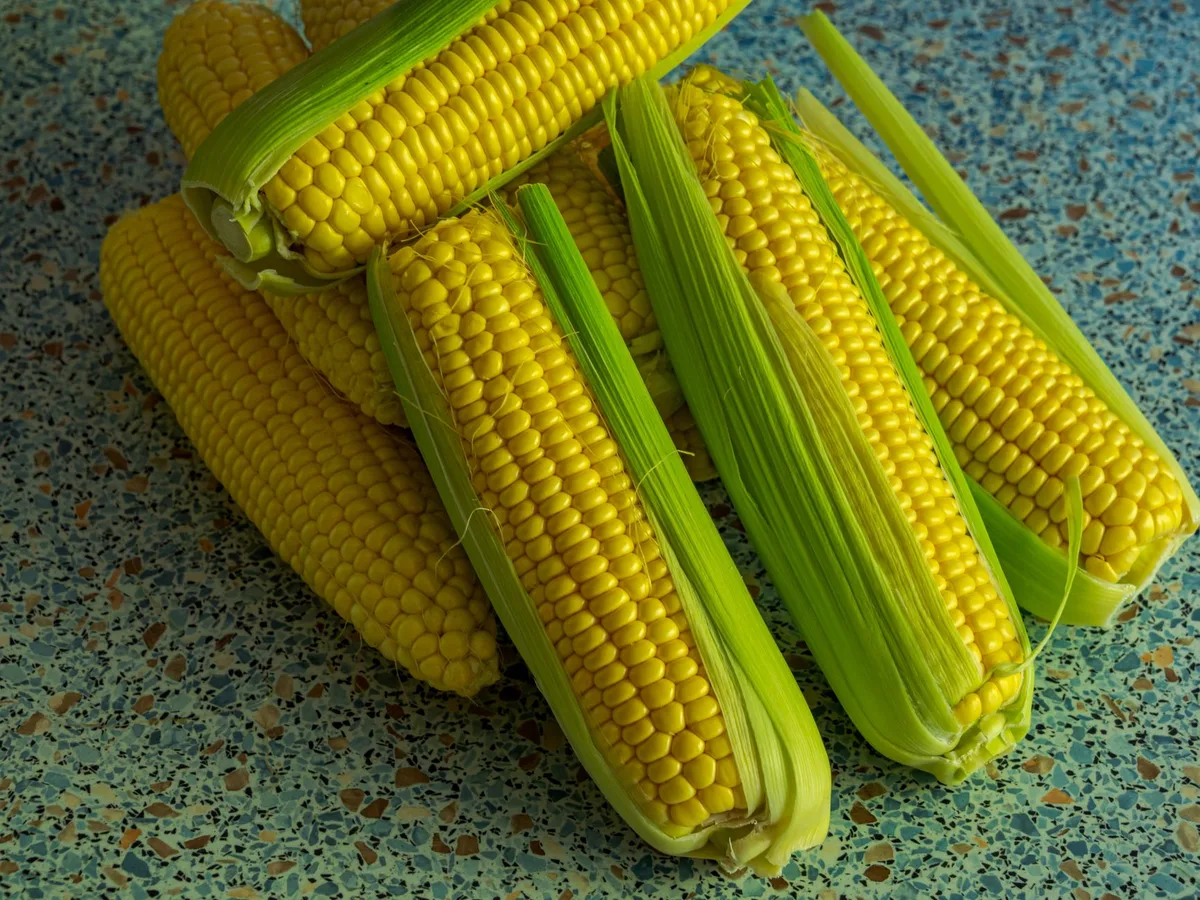
- Select Fresh Ears: Choose corn with green, fresh-looking husks. This indicates the corn inside is likely still moist and ready for cooking.
- Rinse the Corn: Place the ears directly under cool running water. You want them to be damp but not dripping excessively. Do not peel the husks back at this stage.
- Trim Ends (Optional): For a cleaner presentation and to remove any dried-out kernels at the tip, you can trim about a 1/4 inch off the stalk end of the cob with a sharp knife.
- Arrange in Microwave: Place 1 to 4 ears of the rinsed corn directly onto the microwave's turntable or a microwave-safe plate. Ensure they aren't too crowded, as this can affect even cooking. If you're cooking more than four ears, it’s best to do them in batches.
- Cook: Microwave on high power, starting with your estimated time based on the number of ears.
Timing It Right: How Long to Microwave Corn
Determining the correct cooking time in the microwave is crucial for achieving perfectly tender corn. This timing isn't fixed, as it depends on your microwave's power output and the number of corn ears you're cooking simultaneously.
- 1 ear: Typically requires 3 to 4 minutes.
- 2 ears: Usually needs 4 to 5 minutes.
- 3-4 ears: Plan for 5 to 6 minutes.
It's always a good idea to check for doneness a minute before the estimated time is up. The kernels should feel yielding to the touch. If they still feel firm, add another 60 seconds and check again.
The Critical Rest: Letting the Steam Do Its Thing
After the microwave timer signals completion, resist the urge to immediately extract the corn. A short resting period is vital for several reasons. Firstly, it allows the residual steam trapped within the husks to continue cooking the kernels, ensuring they are tender all the way through.
Secondly, and perhaps more importantly for safety, this resting phase allows the internal temperature to stabilize, reducing the risk of severe steam burns when you eventually handle the corn. A 2-minute rest in the microwave is generally sufficient for this purpose. This brief pause is essential for consistent results and safe handling.
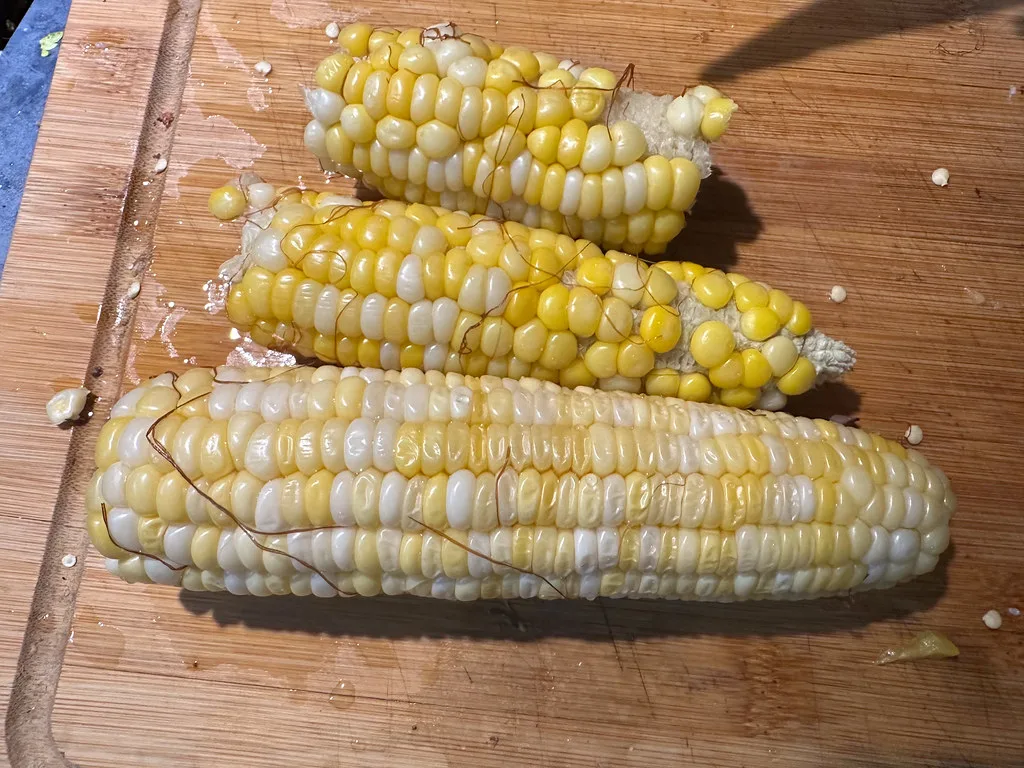
Handling Hot Corn: Safely Removing Husks and Silk
Once the corn has rested, it's time to reveal the perfectly steamed kernels. Carefully open the microwave door and, using oven mitts or a thick kitchen towel, grip the base of an ear of corn. The husks should now slide down relatively easily, carrying away most of the silk with them.
You may find a few stray strands of silk remaining; these can usually be wiped off with a paper towel or picked away quickly. The kernels will be hot, so a quick wipe can also help dry them slightly before buttering or seasoning.
Method 2: Shucked Corn – The Wrapped Approach
If you prefer to remove the husks before cooking or have corn that's already shucked, this method is a reliable alternative. It requires a bit more direct preparation upfront but still delivers excellent results through steaming.
This approach is ideal when you've purchased pre-shucked corn or if you simply prefer not to deal with the husks in the microwave itself. The key is to ensure the corn remains moist during the cooking process.
Step-by-Step: Shucking and Wrapping Corn for the Microwave
This method begins with preparing the corn by removing its natural outer layers, followed by a wrapping technique to retain moisture.
- Shuck the Corn: Completely remove all husks and silk from the ears of corn. Discard these outer layers.
- Moisten the Cob: Give the shucked corn cob a quick rinse under cool tap water. Alternatively, you can lightly spritz it with water from a spray bottle. The aim is to make the kernels lightly damp, not saturated.
- Wrap Tightly: Take a sheet of plastic wrap large enough to fully encase one cob. Wrap the corn snugly. Avoid wrapping it so tightly that the plastic balloons excessively, but ensure it's secure enough to trap steam.
- Microwave: Place the wrapped corn ear (or ears, if space allows) directly onto the microwave turntable. Cook on high power using similar timing guidelines as the in-husk method, adjusting for the number of ears.
- Rest: Allow the wrapped corn to sit in the microwave for at least 1 to 2 minutes after cooking to finish steaming.
- Unwrap with Caution: Carefully remove the corn from the microwave and unwrap it, being mindful of the hot steam that will escape.
Making it Delicious: Butter, Salt, and Toppings
Once your corn on the cob is cooked and has cooled slightly, it’s ready to be dressed up with your favorite toppings. The steaming process leaves the kernels moist and receptive to flavor. A generous smear of butter is a classic choice, melting into the crevices and adding richness.
A sprinkle of salt enhances the natural sweetness of the corn, bringing out its best flavor. Beyond the basics, consider adding a dash of black pepper, a sprinkle of chili powder for a little kick, or even a drizzle of your favorite sauce. For inspiration on flavor pairings, you might find recipe ideas for Bourbon Street Chicken or Ras El Hanout infused dishes offer interesting spice profiles that can be adapted.
Microwave vs. Other Methods: What's the Difference?
While microwaving offers unparalleled speed, it's worth understanding how it stacks up against more traditional cooking methods for corn on the cob. Each method has its own characteristics regarding flavor, texture, and effort.
Grilled Corn
Grilling corn imparts a distinct smoky flavor and often a slightly charred exterior that many people love. The dry heat of the grill caramelizes the natural sugars in the corn, leading to a deeper, richer taste. Texture-wise, grilled corn tends to be tender with a pleasant firmness. However, this method requires preheating a grill, which means more time and setup compared to a microwave.
Cleanup also tends to be more involved, as you’ll need to clean grill grates.
Boiled Corn
Boiling corn is perhaps the most traditional method for many households. It involves submerging ears of corn in a large pot of boiling water until tender. This process ensures even cooking and a uniformly tender texture throughout the cob. The primary drawback is the time it takes to bring a large pot of water to a boil, which can be significantly longer than microwaving.
Draining the hot water can also be a minor hassle.
When Microwave Corn Might Not Be Your First Choice
While microwaving corn on the cob is incredibly convenient and efficient, it might not be the ideal choice for every situation. If you're aiming for a specific flavor profile, such as the smoky char of grilled corn or the nuanced textures achieved through slow roasting, the microwave simply can't replicate those results.
Furthermore, the microwave's heating can sometimes lead to a slightly softer texture than you might get from other methods. For instance, if you're preparing a dish where firm, distinct kernels are essential, more traditional cooking techniques might be preferred. Think about occasions where convenience is paramount versus when achieving a particular culinary nuance is the priority.
Common Mistakes to Avoid When Microwaving Corn
Even with a straightforward method like microwaving corn, a few common missteps can lead to less-than-ideal results. The most frequent issue is temperature control, primarily due to not understanding how long to cook and, crucially, how long to let the corn rest.
- Overcooking: Microwaves can heat very quickly, and overshooting the cooking time can turn perfectly good corn into a mushy, unappetizing texture. It’s always better to start with less time and add more if needed.
- Skipping the Rest Period: This is a critical mistake that can lead to uneven cooking and, more importantly, steam burns. The steam trapped inside the husks or wrapping needs time to finish the cooking process and dissipate safely.
- Improper Wrapping (for shucked corn): If the plastic wrap isn't snug enough, steam can escape, leading to drier corn that doesn't cook as effectively. Conversely, wrapping too tightly might cause the plastic to burst or create excessive internal pressure.
The Critical Rest: Letting the Steam Do Its Thing
After the microwave timer signals completion, resist the urge to immediately extract the corn. A short resting period is vital for several reasons. Firstly, it allows the residual steam trapped within the husks to continue cooking the kernels, ensuring they are tender all the way through.
Secondly, and perhaps more importantly for safety, this resting phase allows the internal temperature to stabilize, reducing the risk of severe steam burns when you eventually handle the corn. A 2-minute rest in the microwave is generally sufficient for this purpose. This brief pause is essential for consistent results and safe handling.
Timing It Right: How Long to Microwave Corn
Determining the correct cooking time in the microwave is crucial for achieving perfectly tender corn. This timing isn't fixed, as it depends on your microwave's power output and the number of corn ears you're cooking simultaneously.
- 1 ear: Typically requires 3 to 4 minutes.
- 2 ears: Usually needs 4 to 5 minutes.
- 3-4 ears: Plan for 5 to 6 minutes.
It's always a good idea to check for doneness a minute before the estimated time is up. The kernels should feel yielding to the touch. If they still feel firm, add another 60 seconds and check again.
Making it Delicious: Butter, Salt, and Toppings
Once your corn on the cob is cooked and has cooled slightly, it’s ready to be dressed up with your favorite toppings. The steaming process leaves the kernels moist and receptive to flavor. A generous smear of butter is a classic choice, melting into the crevices and adding richness.
A sprinkle of salt enhances the natural sweetness of the corn, bringing out its best flavor. Beyond the basics, consider adding a dash of black pepper, a sprinkle of chili powder for a little kick, or even a drizzle of your favorite sauce. For inspiration on flavor pairings, you might find recipe ideas involving chicken or other complementary dishes offer interesting flavor profiles that can be adapted for corn.
Microwave vs. Other Methods: What's the Difference?
While microwaving offers unparalleled speed, it's worth understanding how it stacks up against more traditional cooking methods for corn on the cob. Each method has its own characteristics regarding flavor, texture, and effort.
Grilled Corn
Grilling corn imparts a distinct smoky flavor and often a slightly charred exterior that many people love. The dry heat of the grill caramelizes the natural sugars in the corn, leading to a deeper, richer taste. Texture-wise, grilled corn tends to be tender with a pleasant firmness. However, this method requires preheating a grill, which means more time and setup compared to a microwave.
Cleanup also tends to be more involved, as you’ll need to clean grill grates.
Boiled Corn
Boiling corn is perhaps the most traditional method for many households. It involves submerging ears of corn in a large pot of boiling water until tender. This process ensures even cooking and a uniformly tender texture throughout the cob. The primary drawback is the time it takes to bring a large pot of water to a boil, which can be significantly longer than microwaving.
Draining the hot water can also be a minor hassle.
When Microwave Corn Might Not Be Your First Choice
While microwaving corn on the cob is incredibly convenient and efficient, it might not be the ideal choice for every situation. If you're aiming for a specific flavor profile, such as the smoky char of grilled corn or the nuanced textures achieved through slow roasting, the microwave simply can't replicate those results.
Furthermore, the microwave's heating can sometimes lead to a slightly softer texture than you might get from other methods. For instance, if you're preparing a dish where firm, distinct kernels are essential, more traditional cooking techniques might be preferred. Think about occasions where convenience is paramount versus when achieving a particular culinary nuance is the priority.
Common Mistakes to Avoid When Microwaving Corn
Even with a straightforward method like microwaving corn, a few common missteps can lead to less-than-ideal results. The most frequent issue is temperature control, primarily due to not understanding how long to cook and, crucially, how long to let the corn rest.
- Overcooking: Microwaves can heat very quickly, and overshooting the cooking time can turn perfectly good corn into a mushy, unappetizing texture. It’s always better to start with less time and add more if needed.
- Skipping the Rest Period: This is a critical mistake that can lead to uneven cooking and, more importantly, steam burns. The steam trapped inside the husks or wrapping needs time to finish the cooking process and dissipate safely.
- Improper Wrapping (for shucked corn): If the plastic wrap isn't snug enough, steam can escape, leading to drier corn that doesn't cook as effectively. Conversely, wrapping too tightly might cause the plastic to burst or create excessive internal pressure.
Expert Tips for Perfect Microwave Corn Every Time
To consistently get great results when microwaving corn on the cob, consider a few expert pointers that go beyond the basic steps. These tips help account for variations in equipment and corn quality, ensuring you get delicious corn practically every time.
Adjusting for Your Microwave Wattage
Microwave ovens vary significantly in their power output, often measured in watts. A standard microwave might operate around 1000 watts, but models range from 700 to over 1200 watts. Per manufacturer documentation for common microwave brands, lower wattage ovens will require longer cooking times, while higher wattage ovens will cook faster. You may need to experiment with your specific appliance to find the perfect timing.
Start with the lower end of the recommended time range and add extra increments of 30 to 60 seconds until the corn reaches your desired tenderness.
Dealing with Sturdier Corn
Sometimes, the corn itself might present a challenge. If you notice the husks are dry and brittle, or the kernels seem particularly hard and less plump, you might need to slightly increase the cooking time. For corn that feels a bit past its prime, a brief soak in cold water before microwaving can sometimes help rehydrate it, though this is not a substitute for peak freshness. Always check the corn's feel a minute or two before the timer is up.